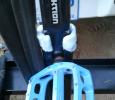
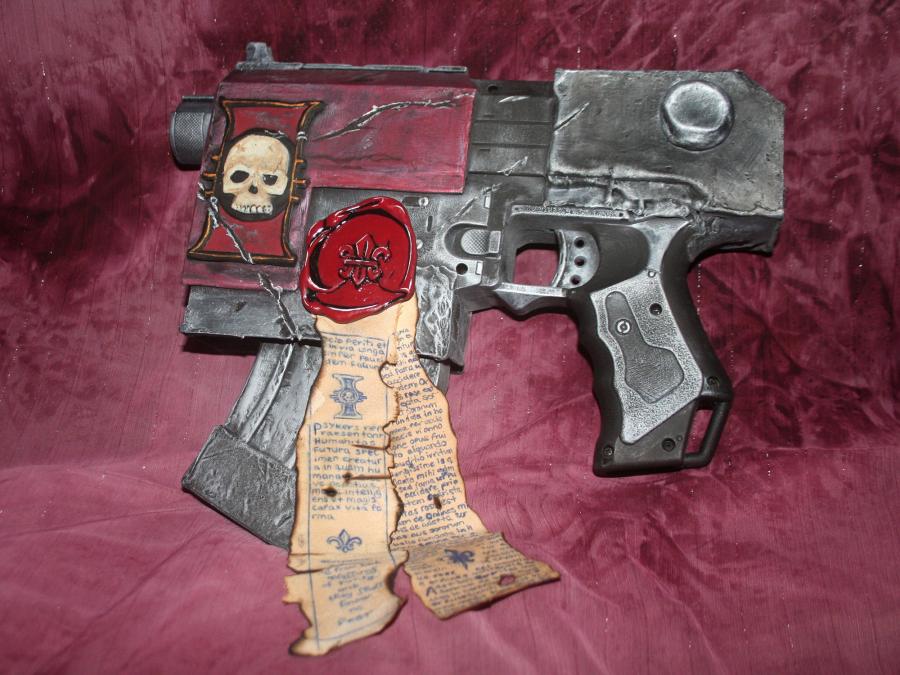
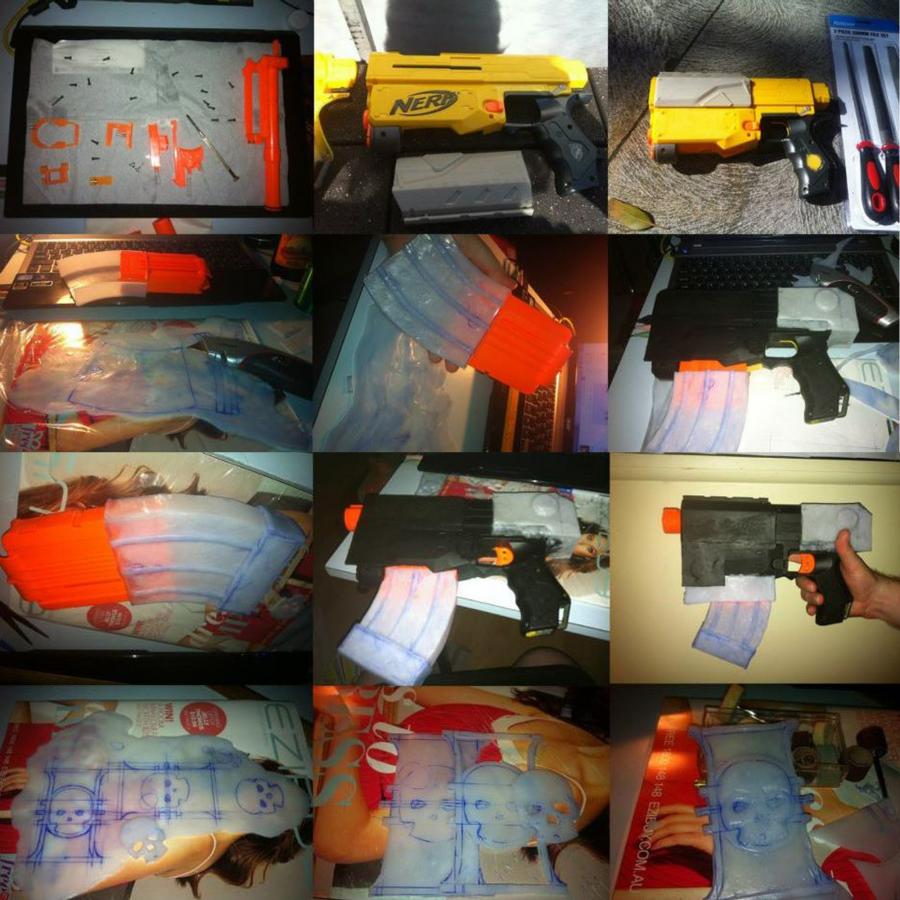
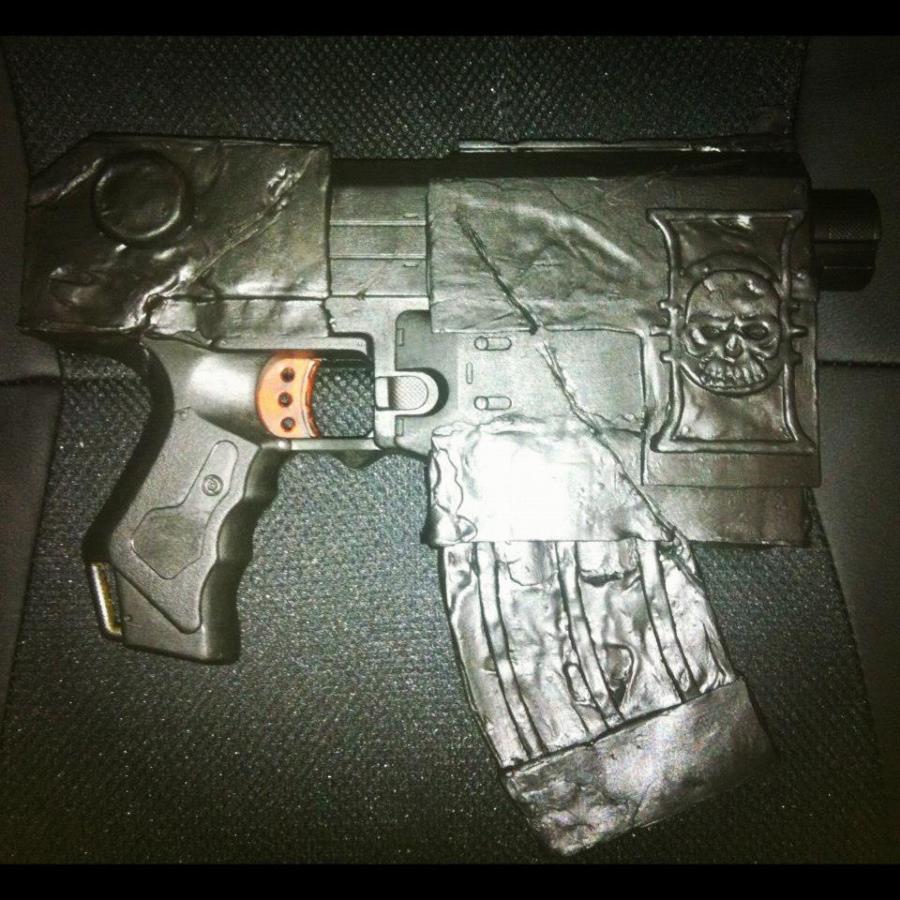
Costume pistol
Dallandra used Plastimake to convert a toy Nerf gun into an impressively detailed costume pistol. She had originally planned to use cardboard for this project. Thankfully she discovered Plastimake and found it to be much more robust than cardboard and easier to form into a realistic prop.
Dallandra kindly agreed to write a how-to explaining the different techniques she used to complete the project. You can follow her work over at the Cos Plus Play Facebook page. There are already a few new projects on there, we look forward to seeing what she comes up with next!
Converting a Nerf Recon CS-6 to a futuristic costume pistol
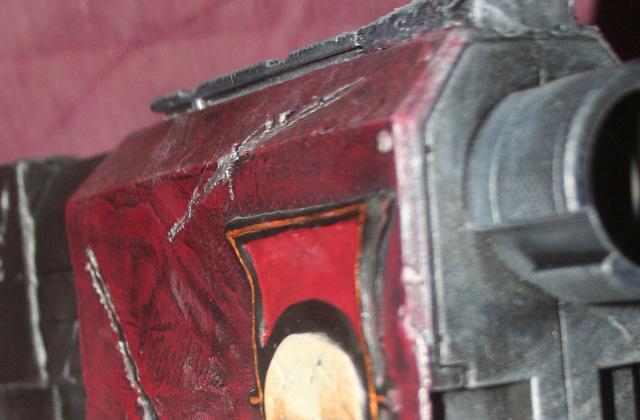
The design of this pistol is inspired by the Sisters of Battle Bolt Pistol from the Warhammer 40,000 universe.
1. Prepare the Nerf gun
Prepare the Nerf gun by taking it apart, sanding all the external surfaces and anything to be painted on later. File off the logos and other print embellishment.
2. Make some Plastimake sheets
Make several flat sheets of Plastimake, for a rolling pin I used a hairspray can. I found a 3-4ml thickness easiest to work with personally. If the sheets are too thin they can warp when working on other sections with a Heatgun later on.
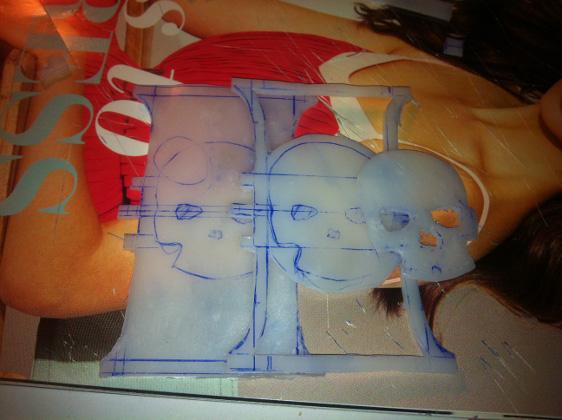
3. Cut the sheets to the required shape
Taking the cardboard used prior to my Plastimake purchase, I turned it into a pattern. Transfer the pattern onto the Plastimake. For the skull motif I drew the desired layers freehand and with a ruler, directly onto the Plastimake. To cut out the pieces I used a Packing Knife.
4. Add the Plastimake components to the Nerf gun
Affix the Plastimake to the sanded surface of the Nerf, taking care what order you do this in, working from the inside out. For the joins I dipped both the edges in hot water and pushed them together to create a strong bond. For affixing layers, like the skull motif, I used a heat gun, taking care to heat the surfaces to be bonded evenly.
5. Heat and refine the Plastimake components
Smoothed out the edges and chopped off any bits that were sticking out. I used a cigarette lighter to heat small sections that needed to be either added to for strengthened, or smoothed them out by wetting the tip of a finger or the wet back of a spoon and rubbing the heated area for a smooth edge/surface.
6. Paint and detail
I Sanded the Plastimake areas lightly, then added several layers of Gesso. Once dry, I added wear and tear from 'battle' with a Dremel tool - scratches/claw or sword marks/dents/chipped missing bits too. It's the details that will bring a prop to life.
The prop is no longer a Nerf toy, and ready to be painted to look like a Bolt Pistol.
More Plastimake projects: